Nothing to see here. I animated this lil bit of this movie.
im the potion seller of art and my potions are too strong for you.
https://bsky.app/profile/gagangrene.newgrounds.com
Age 23
None
Colorado
Joined on 10/5/15
Posted by Gagangrene - March 31st, 2020
This post isn't for Anonfilly
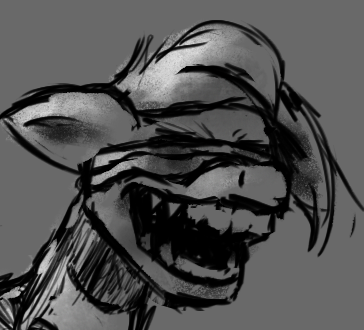
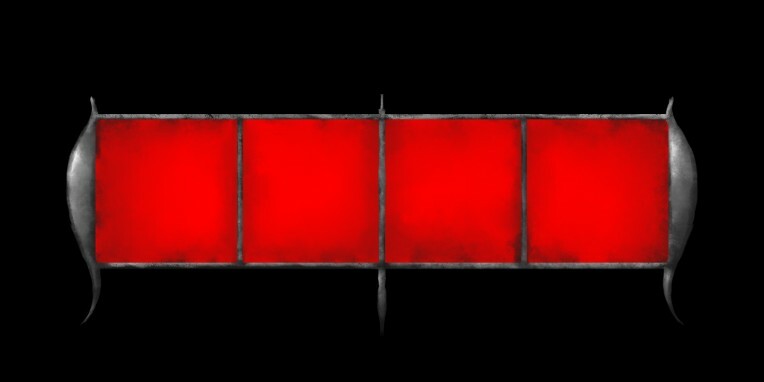
I made a lil health bar for A game affectionately titled "AYUG."
Having joined midway through their development, I had a weird combination of overchoice and listlessness in work to look for, as a lot of things aren't in the game but were being worked on already. The Health bars though, they were newly programmed, and nobody was working on them, so I decided I'd work on that.
The game is set in various medieval time periods, similar to how For Honor and Darkest Dungeon are, without extreme concern for historical accuracy in the plot, so that's the context of how I should make this look.
With that, I decided to mix the visuals of curvy metal and dirty vials, because that just felt right for an old timey look. Did Alchemists even use vials? I didn't actually have any references, I should probably get on redoing it.
But back to what I did do.
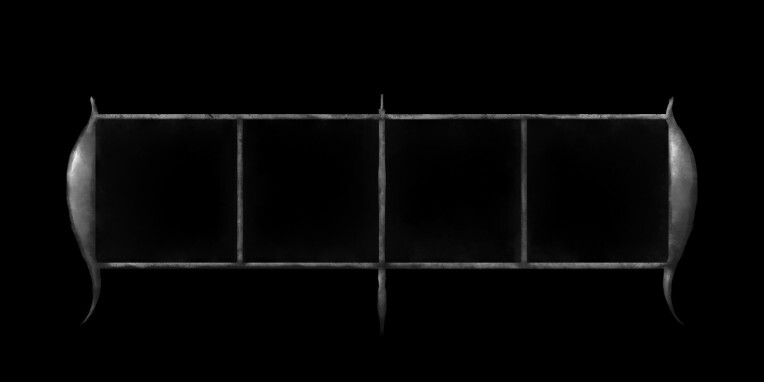
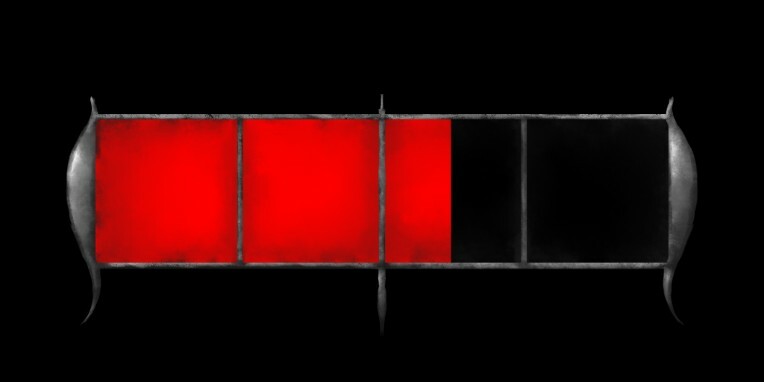
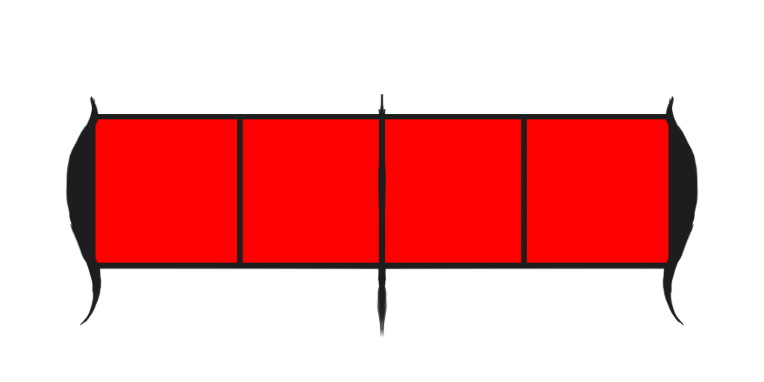
First, I made my canvas size 512x2048, filled it with red, and then shrunk down the red box by 75%, realized that that's not enough vertical space to draw on, and increased the height to 1024. I would use this red rectangle as a guideline to draw everything else around.
Next, I added another layer, hit "select pixels" on the red bar layer (ctrl+clicking on the layer's thumbnail works too), inverted the selection, all so that I wouldn't draw on top of the red bar, and keeping the ends of the bar visible. Also turned on symmetry. I did this so players would be able to accurately know their health even when only a sliver is remaining or a sliver from full. I drew the "metal" as a silhouette, but I just kinda guessed on what that silhouette should be. Once I was happy with the outer silhouette, I deselected everything, and drew those 3 bars to indicate 4ths of hp. I probably could've made the 1/4 and 3/4 lines more accurate. Also, to get straight lines, I just held down shift and dragged the mouse. I like those solid thick lines.
With all that done, I turned off symmetry, made a clipping layer to put on top of the "silhouette" layer, and painted on the white reflections. At first, I just scribbled white where I think the light reflects the most. Then, I used the smudge tool, and smudged the scribbles across the rest of the silhouette. FInally, just applying another lil scribble of white to make the highlight stick out more. Also, to bevel it out a bit, I set my paint brush to clear, and drew over edges.
Lastly, I made a 3rd layer, put it below the silhouette but above the bar, selected the pixels of the red bar again, scribbled around the edges of the red bar, and then smudged them inward to get that dirty look, From that, I called it done.
I need to do it AGAIN, but better.
Posted by Gagangrene - March 19th, 2020
So this boss has more than one attack. In this one, he bursts out of one wall of the Arena at incredible speed, and you as a player need to jump over him. Simple. And then I made it again, because it probably should bob up and down more, like a dolphin.
I started by making a kind of walk cycle. Two keyframes, The first with both the left legs forward, both the right legs back, every part of the tail pointing to the right, and the torso and head adjusted accordingly; Then the second keyframe, which is just the pose mirrored, but not really because I did it all manually and approximately.
Next, I took each leg, and in the time they moved forward, placed another keyframe in the middle for the leg to rise a bit, so the legs weren't just swishing back and forth. I tool the hind legs' keyframes, moved them forward a bit in the timeline, so that they would lag behind the front legs a little. Similarly, I moved every spinal controller forward in the timeline by their distance downward from the torso, and moving the head's keyframes backward on the timeline so the tail is wagging way behind the rest of the body, and the head leads everything else.
Posted by Gagangrene - March 18th, 2020
Along with the idle animation, I remade this slam animation. There's several others I haven't even started on, gotta get those done too, but today I'm talking about this one.
This boss has an attack that telegraphs for 6 frames before crashing down their front-leg and launching shockwave projectiles across the ground for you to jump over. The first animation was made without that timing in mind, with the idea of just gouging out frames to fit the timing, because I didn't know the timing when I started. This time however, I knew the timing, and it's unfortunately pretty sparse.
Unlike the idle animation, I scrapped most of the keyframes and started from scratch, with the exception of the keyframes on frame 0. I tried to break a habit by not going completely straight ahead. First, I put my playhead on frame 5, and posed the body so that his front-and-forward leg was as far up as the armature would allow, and posed the tail to sway less. I didn't manually pose the other three legs at all, but the IK inevitably rotates them anyway.
Then, the immediate frame after, I keyframed every part of the body to be completely prone. Not just the leg back onto the ground, but the nose to the tail all sprawled out. Then, I moved the keyframes around in the timeline so that the more distal parts of the body would lag behind. Also pushed back the "high" keyframes back by one each, because 1 frame was too fast. However, once I got this sprawled out motion down, I went back to my old habits and frame-by-frame animated the torso, hips, legs, and head back to the idle pose, which is frame 0. Not much too it, but this did allow me to shake the body, and communicate a kind of senescence. I did eventually copy/paste the frame 0 keyframes and put them at the end of the animation and adjust the keyframes one or two frames before them to compensate for my predictions, but they were mostly accurate, which is surprising even to me.
Posted by Gagangrene - March 17th, 2020
Let's start with this. it's an idle animation, but there's some things it doesn't do well:
•It doesn't communicate what it is very well; They're 3 times the size of a horse, and 30 like millennia older, so why do they move so effortlessly? He needs to move less.
•The first draft of this guy wasn't quite the right size. He should be about 30% bigger, in pixels.
•The tail wag is actually wrong. The tip leads the middle of it, and it should be the other way around. This is easy to fix, just move the keyframe cycle back.
•With the exception of the tail, all of his body is perfectly in sync. It's not impossible, but it's not often natural either, and is like twinning.
I fixed it to the best of my ability.
•The first and most obvious change to make was to slow it down. By nature there's no start or end to the animation, no real highs or lows of the motion, so a simple operation like this is more likely to work fine. Mouse over the timeline, hit S, then 2, then enter, then I'm done.
•I detailed scaling in my last post.
•Also, as a positive consequence of scaling it up, the elderly cracks in this stone's body become more pronounced, which is perfect. :D
•The tail wag is also pretty easy, just take the tail end's keyframes and move them back to before the tail mid's keyframes. But, I also moved the controllers a bit so that the tail wagged less. Because it looked a lot more extreme than the rest of the body. I also did this with the head, taking it's keyframes and moving them slightly out of sync to the torso's movements (I Didn't care which way in time I moved them, probably should've).
Ultimately, I've got a way better idle animation.
Posted by Gagangrene - March 16th, 2020
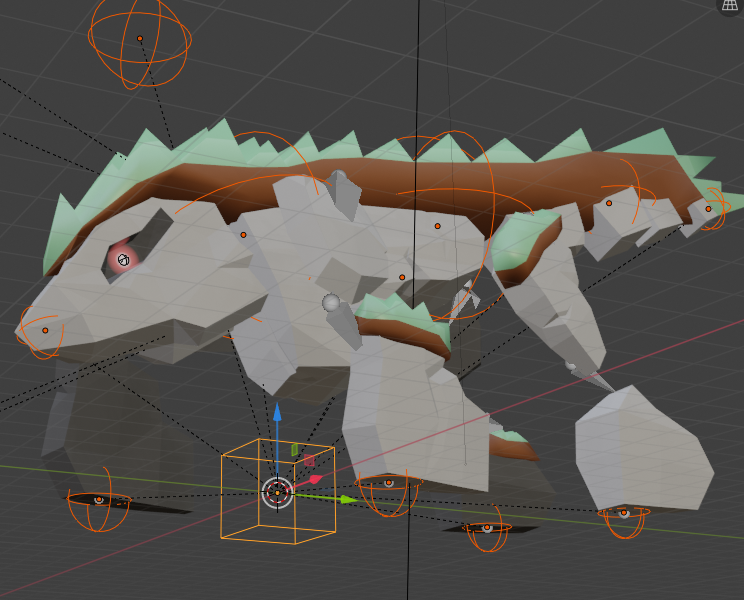
So for Filly Astray, I'm making a boss's sprites in Blender. 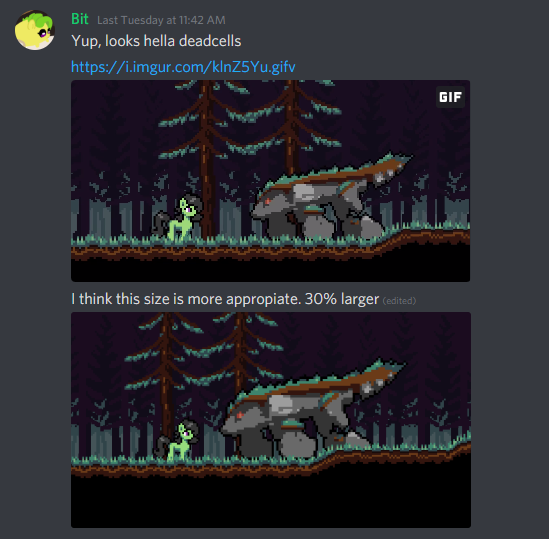
However, boss says this guy should look a little bigger. Scaling up the sprites is a terrible idea and I think we both know that, so I need to scale up the blender model instead.
This should be simple, but it's not. Firstly, I need to mess with the camera's focal length so it can see the entirety of the model, and in consequence, also alter the render settings to keep the resolution proportionally increased.

Divide the old Focal Length by 2 for the new focal length.
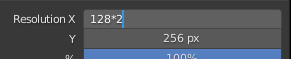
Multiply the old Resolution by 2 for the new resolution, and because it's the inverse of what we divided the Focal Length by.
So now the boss should look exactly the same when I render it (until I scale the actual model up) but should have plenty of room to move around in, because the resolution was increased.
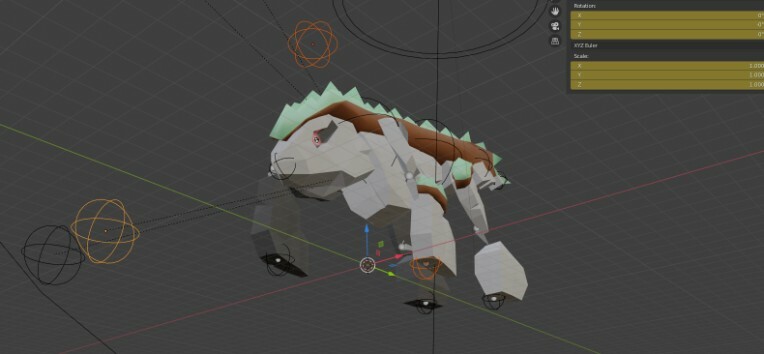
Now for the hard part. The whole of the boss isn't one object, it's 23 different objects (19 empties, 1 Guide, 2 meshes, and 1 armature) constraining, parenting, and modifying eachother in different ways. I can't scale just the mesh, because it's armature deformations are applied after the scale. I can't scale just the armature, because it uses the Empties' positions as guides for IK, and the pose won't scale properly. And I've already been animating the positions of the empties, so I'd need to rinse and repeat any transforms for the empties across every keyframe to solve that problem.
The solution though, it's so Bullshit but it works!
Parent everything to another empty, scale the new empty, and then don't touch it. It feels wrong, but I'm not using the 3D data anywhere else but Blender, so it should be fine. Uh, don't know what to do if I were to export and bring this into Unity. Anyways this took way too long to type, time to animate it.
Posted by Gagangrene - March 14th, 2020

Through several counts of trial and error using UABE, I modded Deimos into Hot Deimos
Posted by Gagangrene - March 11th, 2020
So some 40 days ago, me and my team were in a creative jam, and we got overwhelming issues because we used a Git Repository like an SVN repository, and more importantly put .gitignore in a bad place without knowing it was in a bad place.
So the main issue was that We have our Root directory, then within it the .gitignore, and right next to it, the Unity Project root folder. It should've been in the Project directory, not next to it. I figured this out on February 10th, a full week after Creative Jam was over.
A lot of what we did in the repository was push files straight to the master branch, while more than one of us were working on the master branch at a time. What we should've been doing is working on separate branches, and then merging branches when we needed files, just as good practice.
Also, today I learned the big distinction between commits and pushes, or at least I think. Commits are purely local. Pushes are just letting everyone else pull those commits.
Posted by Gagangrene - March 2nd, 2020
So I'm making a lil 1-minute movie. Not gonna go into great detail about what that movie looks like till it's done, but I'm doing a lot of compositing to get it to look the way it does: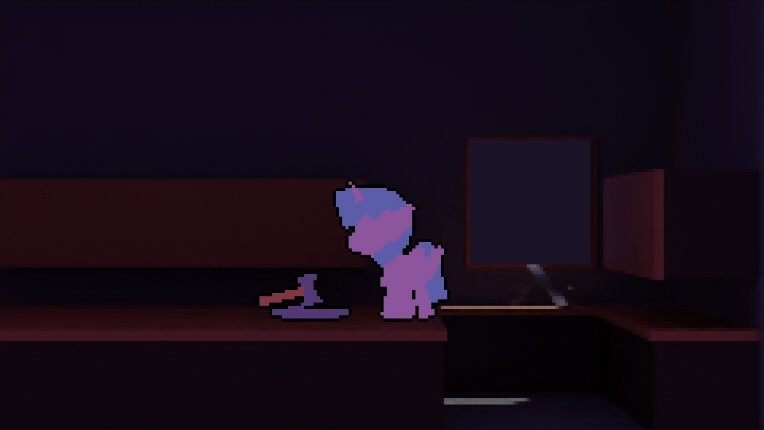
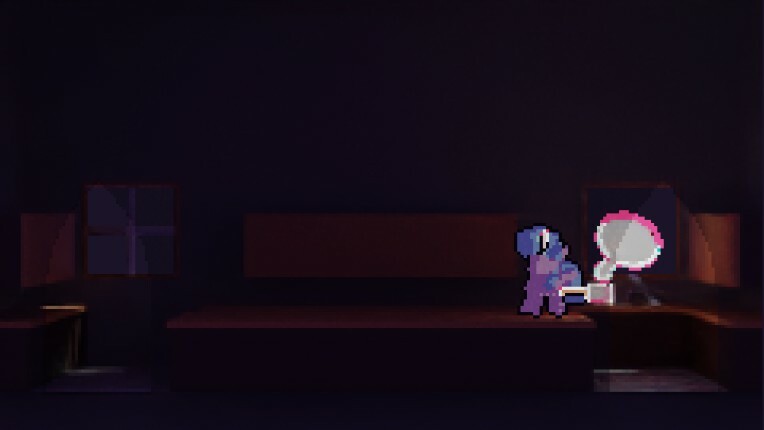
A lot of the heavy lifting is done in the compositor graph to get this animation to look the way it does. And due to the nature of the compositor graph, semi-transparent anything is really hard to do. The solution for me has been to render things I need partially transparent separately, and then mix them on top of a new view layer, which keeps things like outlines intact as seen in the second image when you're seeing through a transparent object. However, this solution pretty much ignores the worldspace of objects to accomplish it's goal, and can cause some very dissonant effects when it's worldspace and screenspace positions don't interact properly. I mean like, if in image 2, the outlined character was in front of the transparent wall in the world, the wall would still be drawn on top of them, and that has the potential to mess with your head.
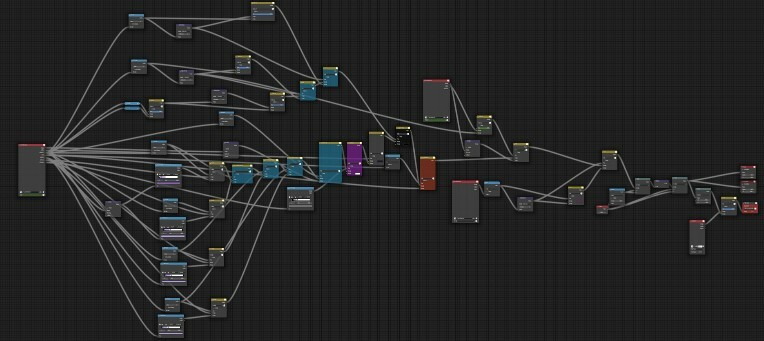
With all that said, how do I get my character to appear behind the transparent wall at one point in time, and at the front in another? The answer is so deceptively simple:
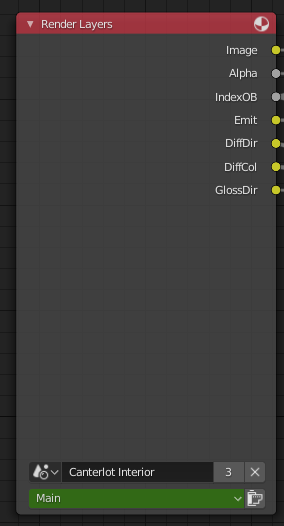
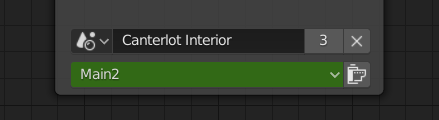
You can literally keyframe what view layer this node uses over time I have the key. It's not too hard to make sense of once you understand, but if it were your typical video editor, it's basically saying that a video layer is supposed to stay in the same place in the layer order, keep it's blending mode, keep it's location on screen etc. But the layer is keyframed to reference a different clip of footage. I have the render layer node keyframed so that it uses a more holistic view layer when the main character is in front of the wall, and so that the render layer node that previously contained the wall is blank. It works so nicely and simply, and I'm just so amazed at how many ways I overthought doing this before I just tapped "I" while mousing over the node.