Firstly, I'd like to attribute a lot of what I'm talking about to the teachings of this video.
I'm assuming you've already got some Blender experience, know how to change shading in the 3D viewport, have a model and scene configured, and you just want to shade it uniquely. You need at least Blender 2.81 for this.
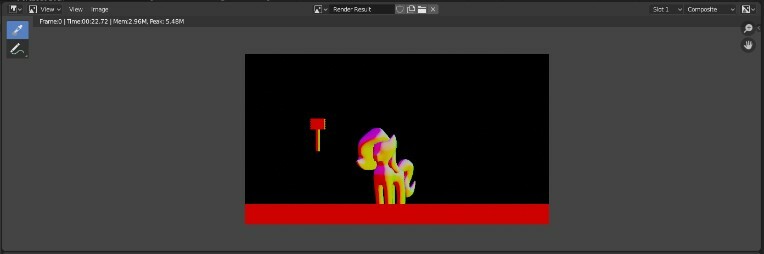
So I can turn this: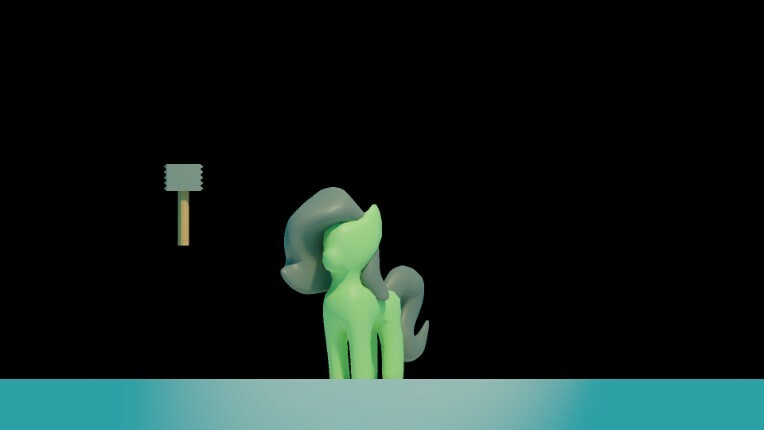
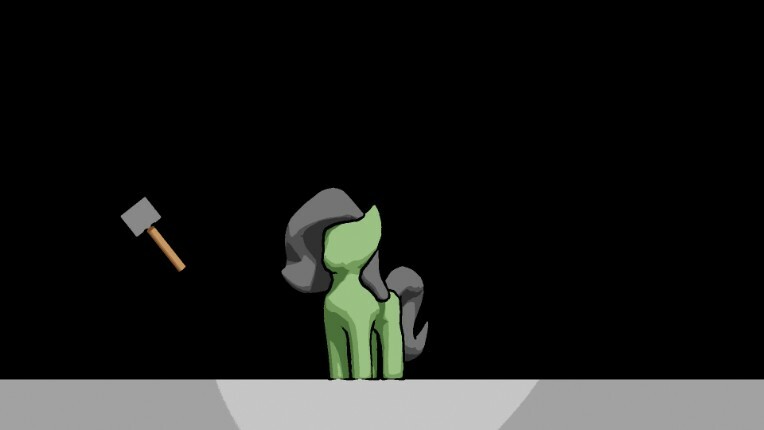
Into this:
With the compositor: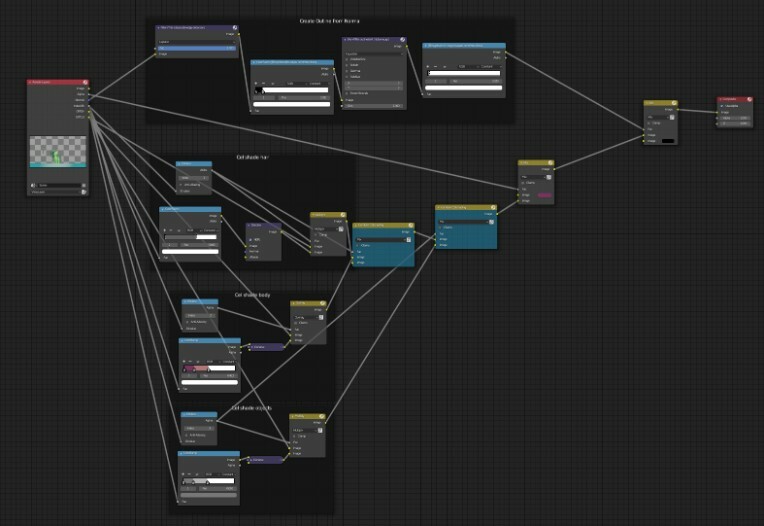
And I'm going to teach you how to do it too, assuming you have a model of your own.
Before you use the compositor, there's a few properties about your project you need to change so you have all the tools to make this.
First and foremost, you need to be using the Cycles render engine, and in the compositor editor, we need the compositor to use nodes.
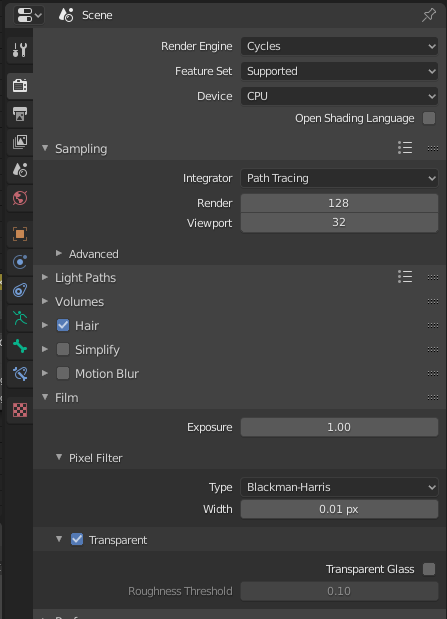

Cycles gives us the most options in the Compositor, of which we will be needing 4, and of which I am using 5.
Also, note that in Render Properties, under the film section, Pixel Filter Subsection, I have the width set to 0.01. This effectively removes Anti-aliasing, the blur on diagonal lines that makes them appear smoother (This is optional, but I have it off because we're using constant color ramps set to constant, and that also won't anti-alias, so I want this whole image to be more cohesive in it's look). "Transparent" is also naturally unchecked, but if checked it will turn the background transparent for our raw render as well as give us an alpha channel to work with in our Render layers node. Speaking of which, let's just look at that for a second:
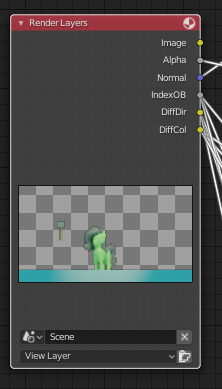

These are our render layers. "Image" is the complete render, Alpha and all the Diffuse layers put together. Alpha is set as described before, and the rest of these options are set here, in Layer Properties:
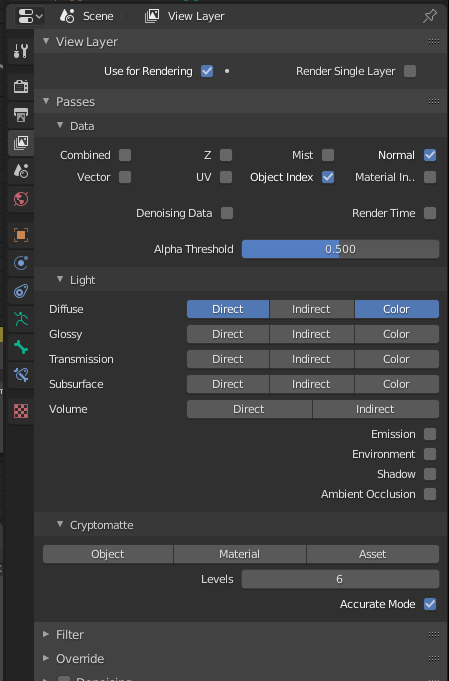
In Data under the Passes section, we want "Normal" and "Object Index" checked. Normal give us a normal map generated from the render which we will use to create our outline. Object Index, shortened to IndexOB, is a unique channel that can be filtered out to create a black and white silhouette of specific meshes, which we will use to mask shadows and thus change each shadows' colors individually.
In the "light" subsection, we also want Diffuse Direct and Diffuse Color enabled, shortened to DiffDir and DiffCol in the Compositor. Direct is a layer describing just the light a model receives, which we can use to Cel shade. Color is a layer just describing the colors from Materials, no light affecting them.
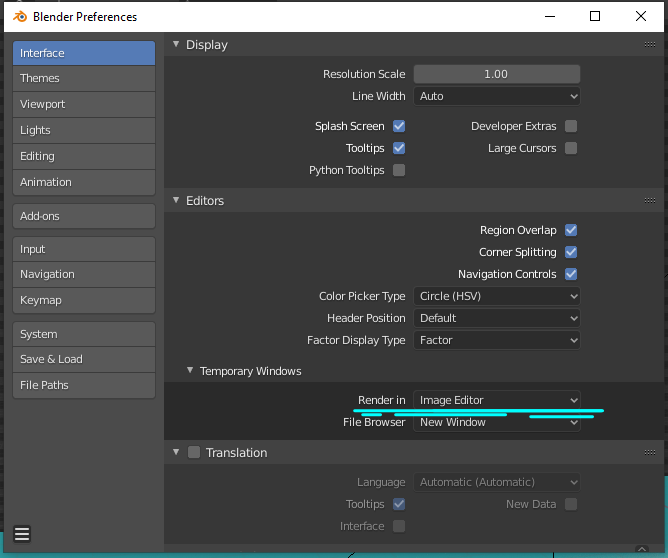
Now you might be reading through and noticing there's not much changing in the 3D viewport right now. That's perfectly intended. We're also not seeing changes anywhere else, and if you've been following this guide, that's also intended. But to clarify where all this is going, press F12, or look at the top left corner, find "Render," and hit "Render image." You will need to do this every time you open the project, and it typically takes some time to complete when using the Cycles render. This will usually open up a new window to show the render, but you can Find "Edit" and hit "Preferences" to reconfigure this to show the render in an area in Blender.
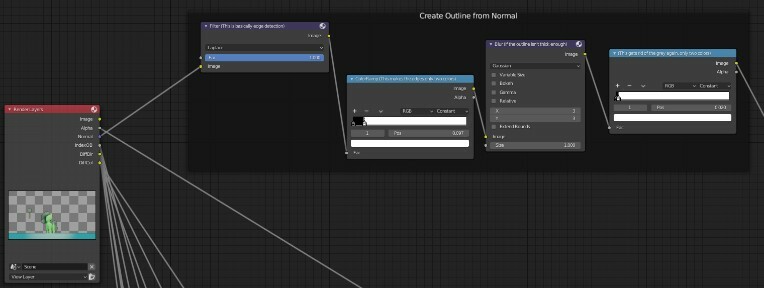
Now for the fun part, where we actually use the compositor. This comes after that rendering process we just did with F12, so you won't need to re-render the whole scene as you edit the compositor graph.

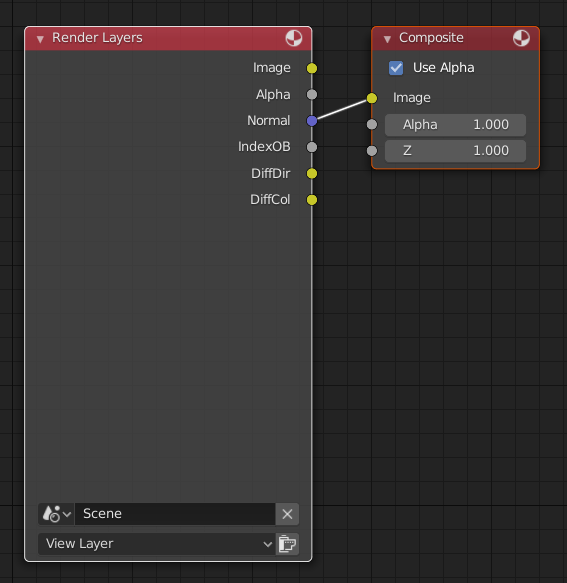
The Nodegraph should by default look something like the image above. The Render Result in the image editor will display whatever connections are in the Composite node. Knowing this, you can take a different "layer" output from Render Layers, feed it into "Image" of the Composite node by clicking on one of the dots and dragging i, and look to your Render Result to see how the render looks. (To make a connection, click on a colored dot to the right of the node, and drag it to a dot on the left of another node Connections flow from right sides to left sides.)
IndexOB won't do anything, right now, but the rest will, and I recommend you experiment and see what they do. Actually, I recommend you feed the output of any your nodes in the process whenever something unexpected or wrong happens. It's great for troubleshooting.
Now, for realizes, we're going to dissect a nodegraph and also explain how to make it. This part of the nodegraph is one way to make the outline, based off of the normal. This method, or at least the way I made it, will not Anti-Alias, but stay tuned if you DO want anti-aliasing.
To create a node, go to "Add" in the top left corner. Alternatively, with your cursor over the compositor area, press Shift+A.

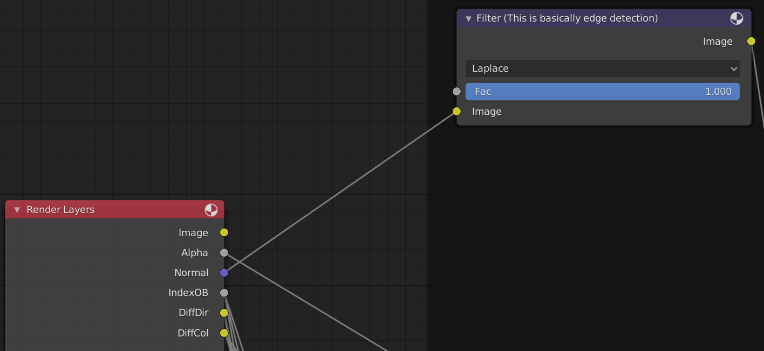
We're going to want a Filter Node, first. Set it to Laplace, and connect The Normal output to the Image Input.
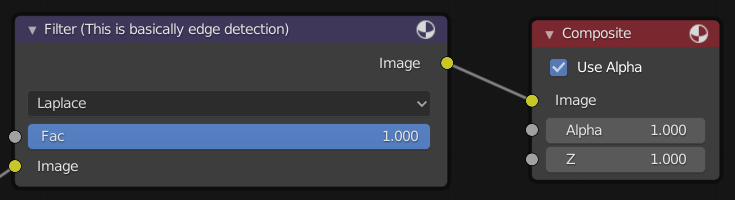
And, maybe we should also take the output image from the Filter Node, and connect it to the Compositor Image Input, and look at what it does to the render result.
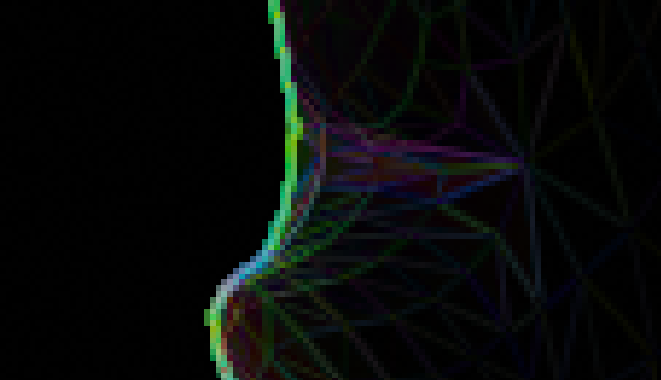
The Render Result should look something like this: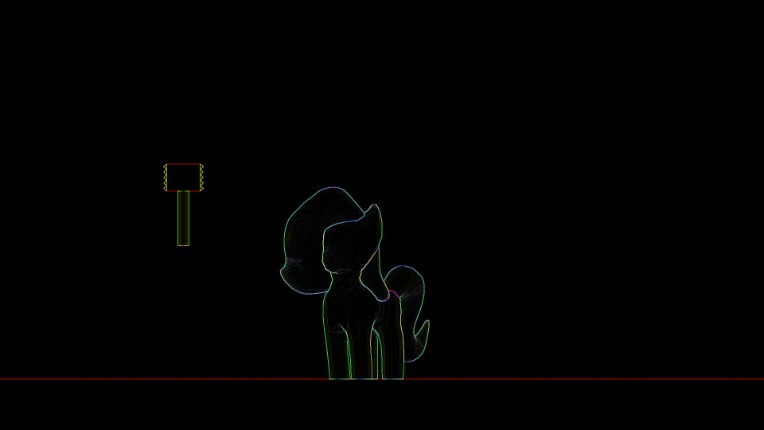
Maybe it looks useful to you, but you and I both know that this alone isn't going to be useful. It's Edge-detecting EVERYTHING. Every edge is traced to some degree.
And that's what the next node is for, to gut out all those unwanted edges. And there's two methods to get rid of it.
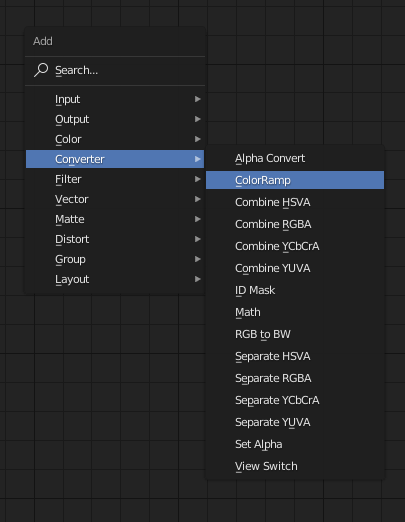
We need the Color Ramp Node for both methods.
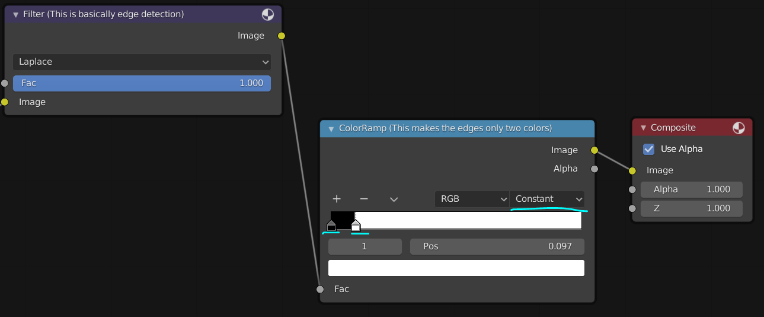
Where the methods diverge is how we use the node. For this first method, we're not going to be doing any anti-aliasing and removing the colors from the Laplace output. Change the interpolation method from "Linear" to "Constant,"
and hold-click the little white box at the rightmost edge of the value scale, and drag it towards the left. As you drag it to the left, edges should start appearing as white.
(Uh oh, Newgrounds won't allow a 21st image on this post so time for another blog post.)