I plan on doing this more frequently.
So for the past 3-4 weeks I've been learning how to use Shader Nodes in Blender to make more efficient materials, and assets for a Unity game.
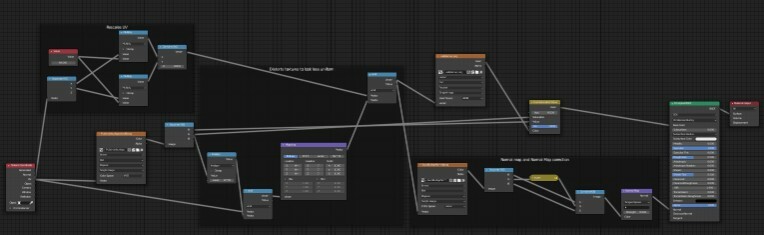
This is the code for a burlap texture I made on my own.
So I started learning this on I think... The 7th, Monday the 7th of October?
H2} Day 1, I was looking at my Game Development teacher's work.
One of the things he was showing off was a set of nodes in Unreal that distorted his wood texture in a certain pattern so that the texture stopped and started as if the wood texture was several boards. I thought: That looks cool, I should do that! So I did. Or at least, I tried.
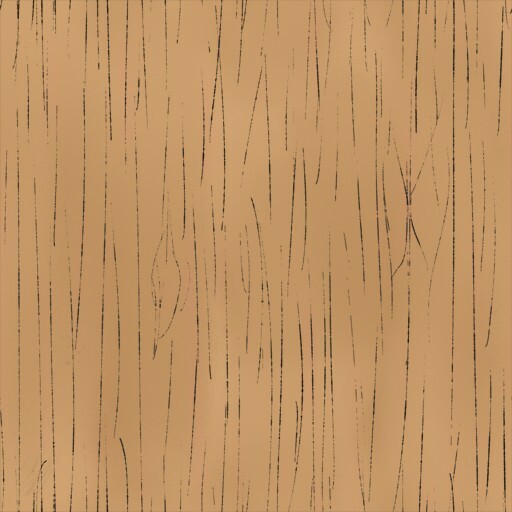
I already had a wood texture:
And I had seen an image of the boards as different shades of grey in the graph, and I tried to mimic that with the red channel in this image that I'm going to call the offset (The other channels have been hidden for clarity):
I knew I needed a second texture node, a texture coordinate node, and an RGB separator node, and thought I needed a mapping node, but had not a clue where to go from there. I was getting something similar to this:
I didn't really know what I was looking at, although it looked like a broad approximation of what I was going for. I couldn't understand it any further, so I went to my teacher for help. The two big issues were that I was using the wrong nodes for math:
the mapping node was vestigial, when I was making this and also now in my burlap code, as I have only have only recently found. Instead I needed a vector math node for the red channel to modify the UV, and also could use a scalar math node to multiply the red channel to increase/decrease the offset to my liking.
I had my image's texture set to linearly interpolate color between pixels, combined with a minuscule image size of 16x16, which is why all the rectangles in here were so round around the edges.
I was feeding my wood texture a red channel for a UV. Not exactly sure why the material responds to the problem like this, but textures seem to only like to be fed UV coordinates.
Anyways, me and my teacher fixed this problem. Firstly, a vector math node was implemented. Instead of feeding the red channel directly into the texture, we'd feed it into an "add" vector node with the UV, and use the output of that for the texture. We also changed the offset texture's interpolation to "nearest," which made it's effects hard and integer-ish, as intended. The results aren't as obvious, but hopefully you can still see them:
Next, I wanted to make a brick texture.
This time on the 8th and 9th of October.
I started with a similar approach. First, I made my brick texture in Photoshop, like this, though it did look a little different at first and also had a supplementary normal map:
Next, I made a miniscule square offset image with two different tones separated equally on the top and bottom. I tried to get the offset to loop once for every two bricks, and have it offset every other brick twice as much. I was stumped when I found the UVs were unitary instead of pixel based, meaning that the UV would fit a square as equally as it would fit this rectangle of a brick. I wanted to find a way to scale the UV on one axis with nodes so I could fix this issue, but didn't yet understand how so I went to my teacher again. Unfortunately this was about the end of the day so I didn't get the answer until tomorrow. The next day, we designed an even-odd function so that every other unit integer would be offset by a half a unit to the right.
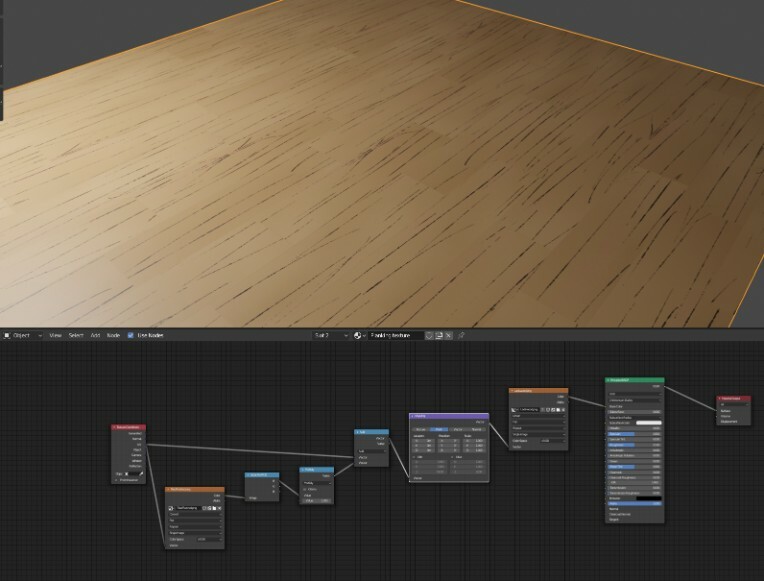
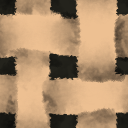
However, the greatest thing I've made so far is this aforementioned burlap texture:
And all with these 3 textures no less, THESE ARE THE ACTUAL SIZE.
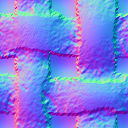
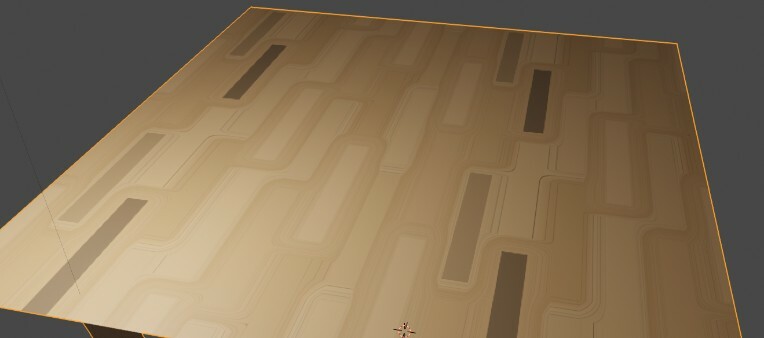
By default, the burlap pad's UV is just one big square that stretches to each corner of the unit. The shader scales the UV up by 64, inversely scaling down the texture to 1/64²th of the size of the burlap pad. It loops of course, so this itself isn't an issue. HOWEVER, this alone does make the material appear awfully grid-like, and that's not to be desired.
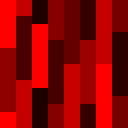
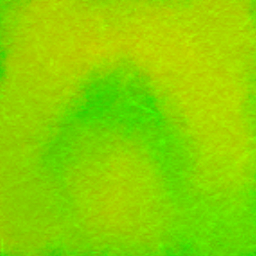
So next, I made the weird greenish-yellowish image on the left. It's not fed the rescaling nodes like the burlap texture is, so it's 1:1 with the UV still. It's green channel is used to distort the UVs further, as well as adjust the saturation of the texture. The red channel affects the value, which is what creates that gross stain in the middle. This combined, I think, does a good job of shrouding the mundane-ness of the actual burlap texture.
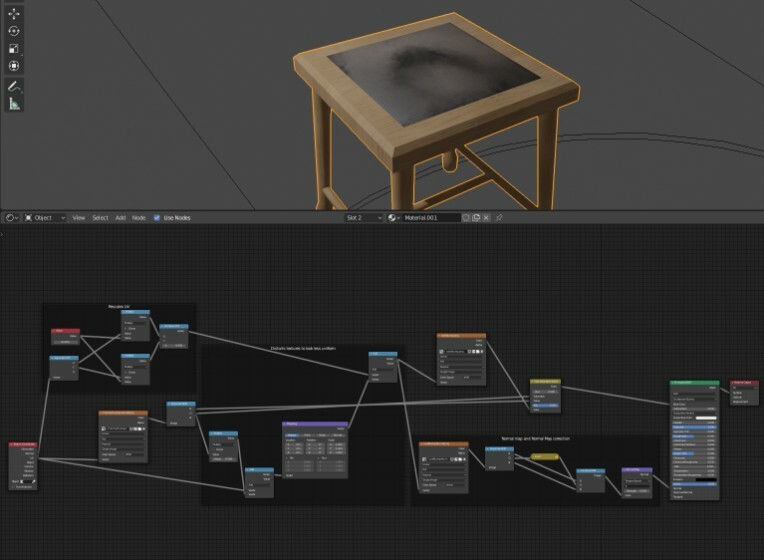
The next week and a half was spent putting these textures and shaders onto some modular assets in blender for the Unity game, nothing very interesting.
I did have to spend a bit of time trying to figure out how I needed to scale the UVs so that the mortar of my brick texture started and ended nicely, that the assets looped in multiple directions, and that the materials weren't stretched at all. Scaling all the individual vertical faces by 11/12 (The 11 comes from the height of the wall, the 12 comes from a 6 and a 2 in the scaling in the shader nodes), and then scaling them again when it's the inside of a doorframe and 11/12 doesn't fit properly. fun stuff.
Getting them into Unity on the week of Halloween gets interesting again.
Unity doesn't come with a shader graph by default, instead with an addon shader graph package. I get that into Unity. After reading a bit of the documentation on the shader graph, I make a shader with it. Immediately, there's a red error symbol next to the master node saying that the shader's "not compatible with the current render pipeline," and I ignore it, and try to make a simple shader anyways. Then I give a material the shader, and the material appears as pure, blazing magenta. Okay, so I guess I need to fix this error now, it's not because it's missing something inside the shader itself.
So I start asking the programmers for our game, the most experienced with Unity, "Do you know what a render pipeline is?"
"No."
Okay, time to learn about render pipelines, here we go!
Unity's documentation starts to get disheveled at this point, linking to pages that don't currently exist and only ever speaking as if trying to sell me something. Eventually I figure out that I need the lightweight render pipeline addon to use the shader graph. I get that. Nothing happens of course. The document I'm looking assumes I've already done a few steps that I didn't, and it gets me no-where. Then the weekend comes, and my eyes are just kinda cleared with nothingness as I take a break from Unity. I come back, and start digging through the documents with searches instead of links. FINALLY, some answers are in sight. Apparently I needed to make a Render Pipeline asset, and then get the project's graphics settings to reference that asset when considering rendering, and only then would the custom shaders I made even render properly. Once I got that sorted out, I could finally get bricks completely into Unity. I don't actually have pictures for any of this because I'm writing this away from the work computer, sorry.